> ## Documentation Index
> Fetch the complete documentation index at: https://docs.windsurf.com/llms.txt
> Use this file to discover all available pages before exploring further.
# コードレンズ
> Windsurf のコードレンズを使用して、エディタ内で関数やクラスに対する Explain、Refactor、Docstring の操作をすばやく実行できます。
## 説明、リファクタリング、Docstring の追加
テキストエディタ上部で、Windsurf は関数やクラスに対して「コードレンズ」を表示します。
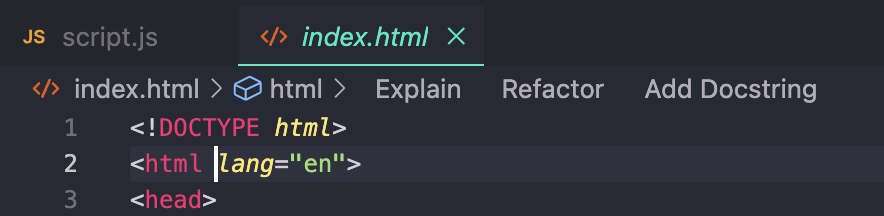 `Explain` コードレンズは Cascade を起動し、関数やクラスの役割や動作を分かりやすく説明します。
`Refactor` と `Docstring` のコードレンズは、いずれも Command を起動します。
* `Refactor` をクリックすると、Windsurf が選択可能な事前定義の指示をドロップダウンで提示します。自分で指示を記述することも可能です。これは関数を選択して Command を実行するのと同等です。
* `Docstring` をクリックすると、Windsurf は関数ヘッダーの上に docstring を生成します。
(Python では、docstring は関数ヘッダーの「下」に正しく生成されます。)
`Explain` コードレンズは Cascade を起動し、関数やクラスの役割や動作を分かりやすく説明します。
`Refactor` と `Docstring` のコードレンズは、いずれも Command を起動します。
* `Refactor` をクリックすると、Windsurf が選択可能な事前定義の指示をドロップダウンで提示します。自分で指示を記述することも可能です。これは関数を選択して Command を実行するのと同等です。
* `Docstring` をクリックすると、Windsurf は関数ヘッダーの上に docstring を生成します。
(Python では、docstring は関数ヘッダーの「下」に正しく生成されます。)